Getting Started with Mumara ONE
Overall, getting familiar with Mumara ONE is a straightforward process, and as soon as you have set up an account, you should have no problem picking the interface. Even if you’re unfamiliar with this type of software, the graphical user interface is designed so you can understand it just by exploring it. This makes it an excellent choice for people who want to save time and get started using all the features without having to go through a lot of training first.
Signing up for a Mumara ONE account
If you’re not already a Mumara ONE user, sign up here. You can pick your plan or start with the free option. During the signup, you’ll need to verify your email address using the validation code you’ll receive in your email, so make sure you use the correct email address and also check your spam folder.
Note: Do prefer using a business email address instead of a free email (e.g., Gmail, Hotmail, Yahoo, etc.) for quick account validation.
Logging into Mumara ONE
The login details you received in your inbox should work for both your Billing and Mumara ONE accounts. If you need to access your Mumara ONE account, https://one.mumara.com is the place to go. For your billing account, head to http://billing.mumara.com.
A Quick Guide to Your First Campaign
Although our documentation covers everything in detail, below, you’ll find quick steps to schedule your first broadcast.
Sandbox Assets
Every account comes up with pre-added assets to help you get started on the right foot. There’s a Test contact list (which already includes your own email address), a test broadcast, a shared node (IPs pool), and a sandbox domain, for example. The test contact list is just for trying things out and is limited to 25 contacts. The sandbox domain is the same- it should be used for experimentation and is limited to 100 emails in total. The Contact Lists, Broadcasts, and Sending Domains pages to give you an insight into how they appear in Mumara.
Send a Test Campaign
As the new account is already set with sandbox assets to get you started for a quick test, so navigate to Actions -> Schedule. Go through the wizard, give your schedule a name, and select Test List, select My First Broadcast, select the Sending Node you see, and press Schedule while keeping the pre-selected values as they are.
You’ll see a scheduled campaign that should start the next minute, and it will send the test broadcast, i.e., My First Broadcast, to the Test List. Once the campaign is finished, check your mailbox for the new email that came from your Mumara ONE account.
You can find the results in the Broadcast Statistics section.
Add Sending Domain
Adding a Sending Domain is required, as it will be responsible for appearing in the Mail FROM Headers when your recipient receives the email.
To add a Sending Domain, navigate to Setup -> Sending Domains. Here on this page, it will list the domains that you’ll add. Click on the [+Add New] button to add your Domain Name.

Adding the Sending Domain will ask you to verify the ownership by adding a DNS key value or uploading a file to your hosting.
To authenticate your sending domain and brand the outgoing emails, you should turn on the DKIM signature, Tracking Domain, and Custom Bounce Domain.
Details: More details on the Sending Domains can be found here: Sending Domains
Add Contact List
When you navigate to Lists -> Contact Lists, you’ll find a pre-built contact list Test List as shown below.

Add a new list by clicking on the [+Add New] button and following the instructions on the page. Make sure to select the correct sending domain for the Owner's Email.
Details: More details on the Contact Lists can be found here: Contact Lists
Add/Import Contacts
Now let’s add or import contacts to the Contact List that you just created. When you schedule a broadcast to this list, these contacts will receive the emails.
Now, add or import contacts to the Contact List you just created. When you schedule a broadcast to this list, these contacts will receive the email.
Add a Contact
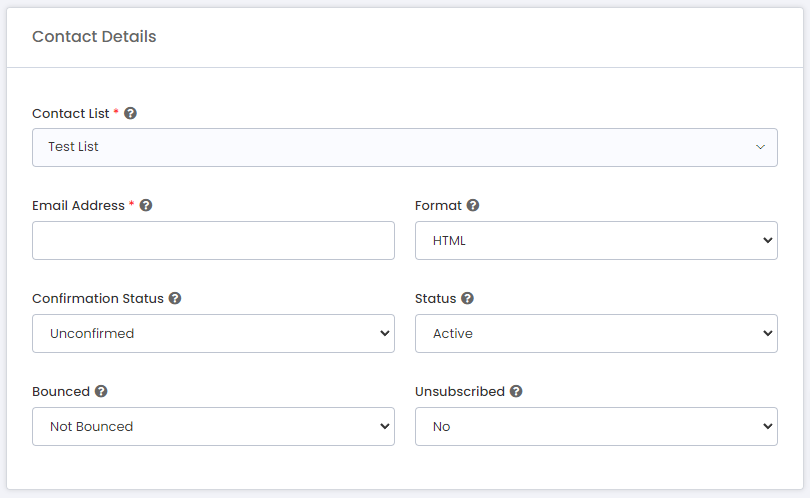
To add a contact, navigate to Lists -> Contact Lists. In the actions dropdown, click on Add a Contact. Alternatively, you can navigate to Contacts and click Add a Contact. Follow the instructions on this page and press Submit while keeping the pre-selected values as they are.

Details: More details on adding the contact can be found here: Add Contacts
Import Contacts
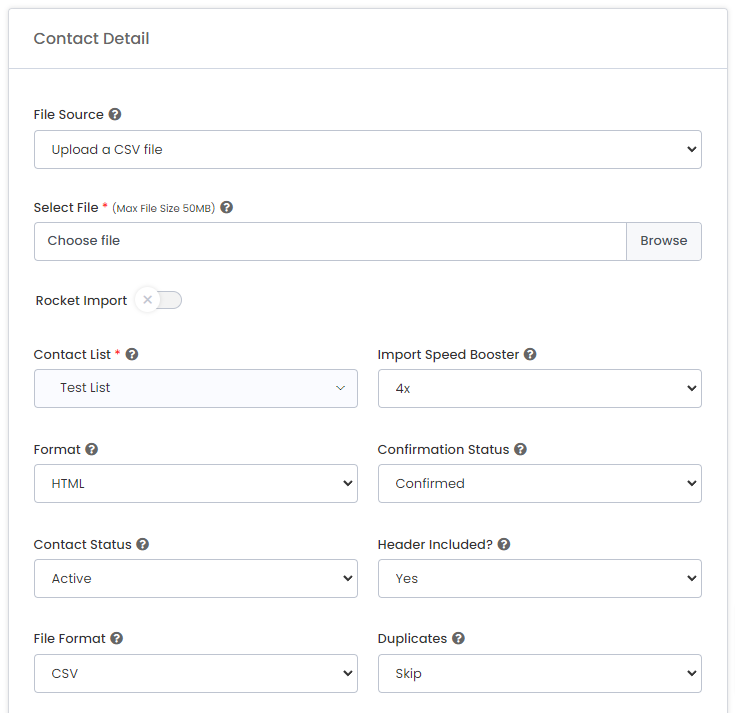
To import contacts, navigate to Lists -> Contact Lists. In the actions dropdown, click on Import Contacts. Alternatively, you can navigate to Contacts -> Import Contacts. Select Upload Your File the tab and select the CSV file from your computer by clicking the browse button. Keep the pre-selected values unchanged and press Next to map the file headers to the fields, and press Start Import.

Details: More details on importing contacts can be found here: Import Contacts
Add Broadcast
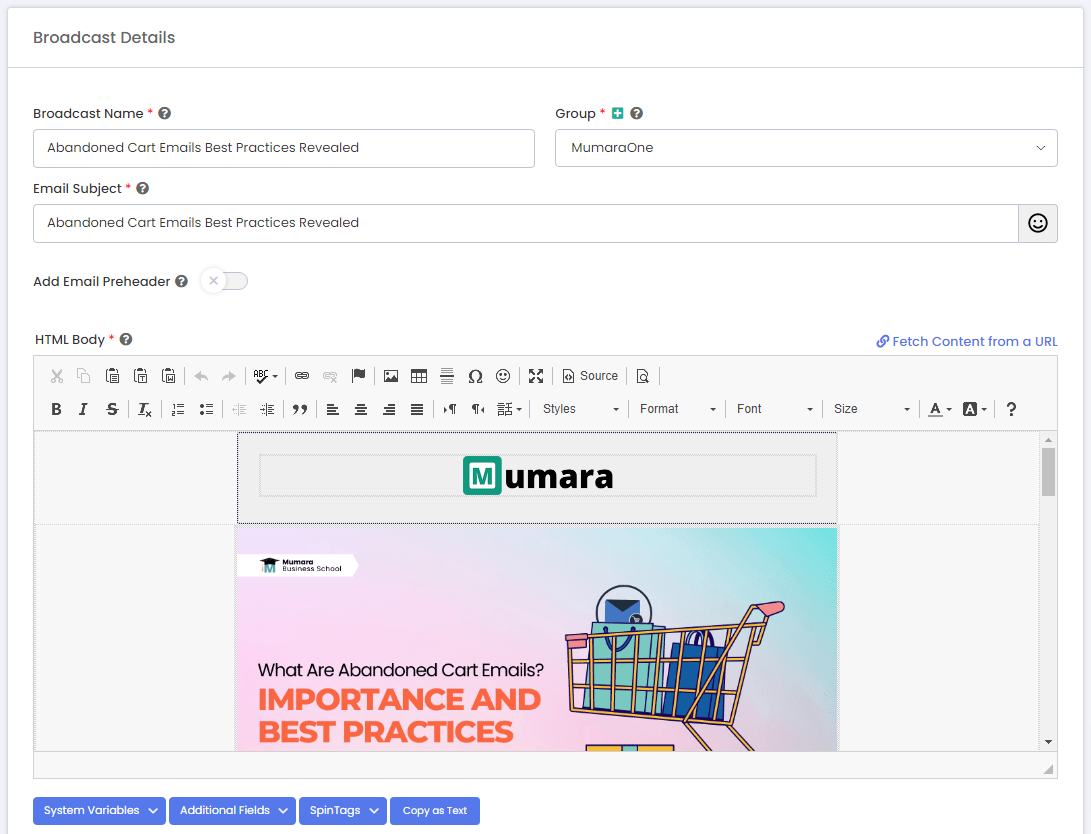
A broadcast is where you add the content of the email that your recipients will see. To add a broadcast, navigate to Campaigns -> Broadcasts and click on the [+Add New] button.

You’ll need to add both versions of the email, i.e., the HTML and the Text. The recipients who don’t have HTML mode enabled for the mail client will see the TEXT version of the email.
Details: More details on the broadcasts can be found here: Broadcasts
Personalization Options
To personalize the email content, you have the options to add profile field values, systematic variables, dynamic tags, spin tags, and more.
Details: More details on email personalization can be found here: Email Personalization
Schedule Campaign
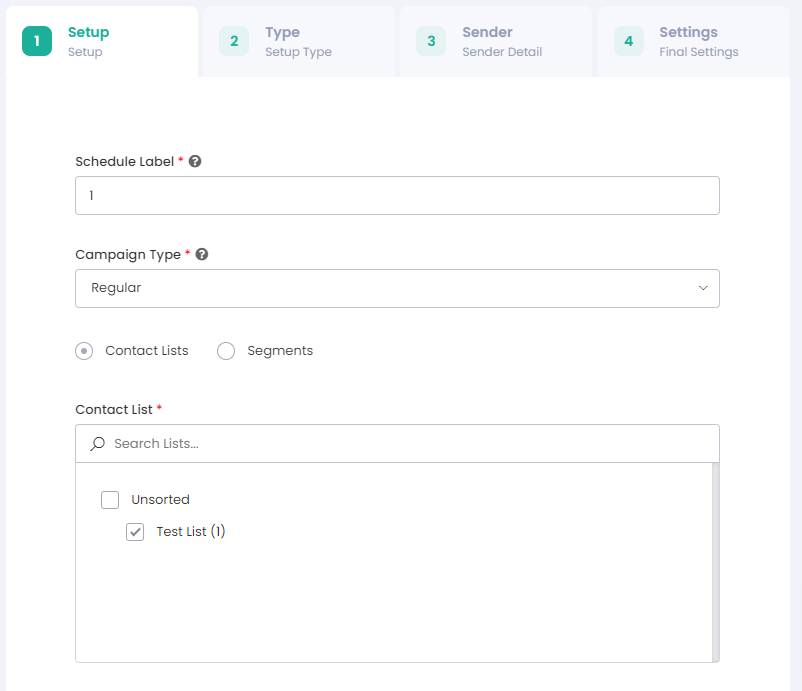
Now that you’ve added your Sending Domain and imported some of your contacts into the Contact List, let’s schedule a campaign by navigating to the Actions menu and clicking Schedule.
Name this campaign and select the Contact List where you imported your contacts.

Follow the wizard and select the contact list, broadcast, and sending node on the next steps while keeping the pre-selected fields as they are. Click Schedule on the last step!
A campaign will be scheduled that should be running any moment the next minute. You can keep track of the real-time count of the emails being sent on this page.
Details: More details on scheduling the campaigns can be found here: Campaign Scheduling
